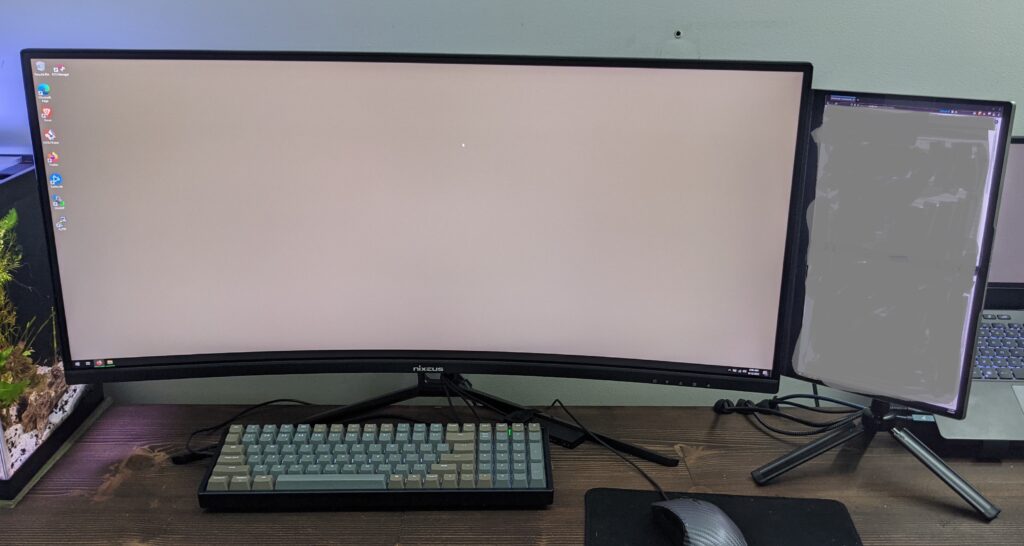
Converting a Laptop Screen into a Standalone Monitor

When I set out to convert a Lenovo C940 laptop into a router, I knew the screen wouldn’t be necessary so I removed it. However, I couldn’t let a 14 inch 4k display go to waste, so I converted it into a standalone monitor.

The conversion was relatively simple. After researching display protocols for internal laptop monitors, I found that the screen had an embedded DisplayPort (eDP) connector to communicate with the laptop’s motherboard. After searching for the part number of the LCD on aliexpress, I found an eDP controller board that claimed to be compatible with my lcd. After waiting a few months, the board arrived and thankfully worked great out of the box. It provides a USB-C input and an HDMI input along with a sound output and a touchscreen controller input which I am not using. The single USB-C connector provides both the power and video signal for the monitor.
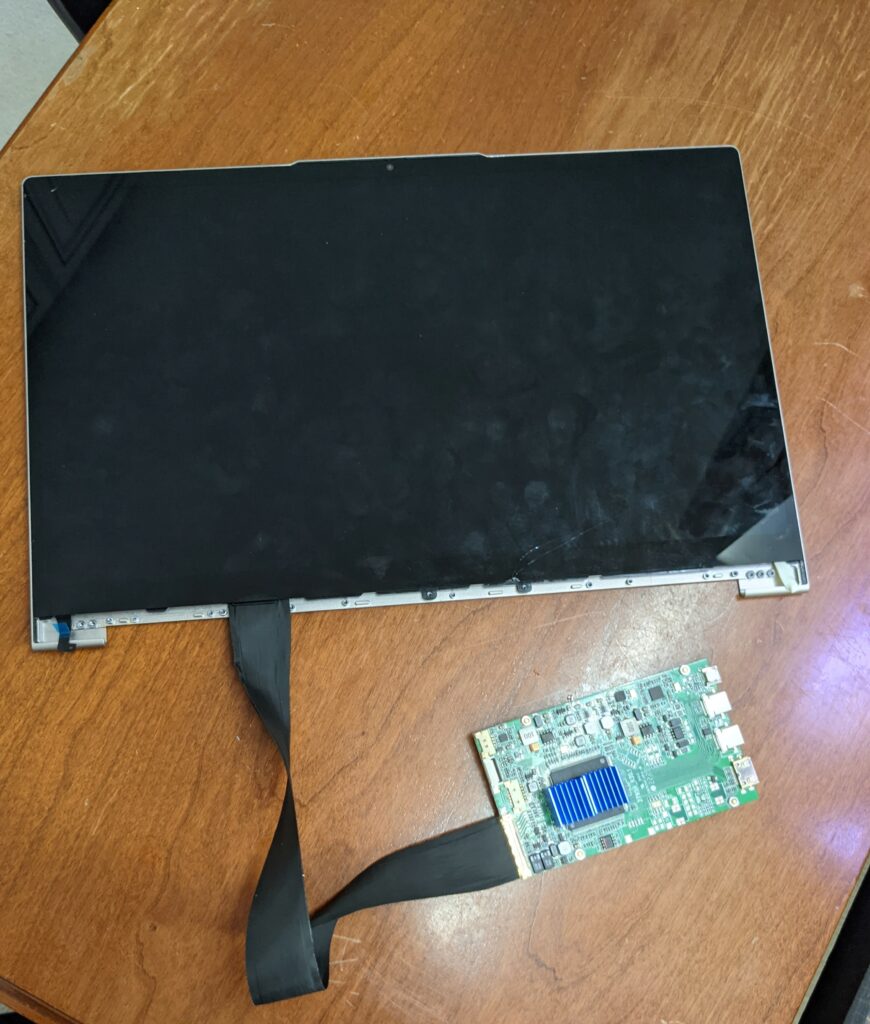
This was the confuguration for testing to verify that the board was compatible

I cut an acrylic panel to the same size as the display, and bolted it to the back with some small screws. There is a channel cut on the inside of the acrylic panel through which the eDP cable is routed in order to protect it and hide some of the slack. The controller board is attached with some short brass standoffs which are epoxied into the acrylic panel. I cut another smaller square of acrylic and installed a 1/4 x 20 threaded insert which was then adhered to the main panel so I could mount the screen to a small tripod.
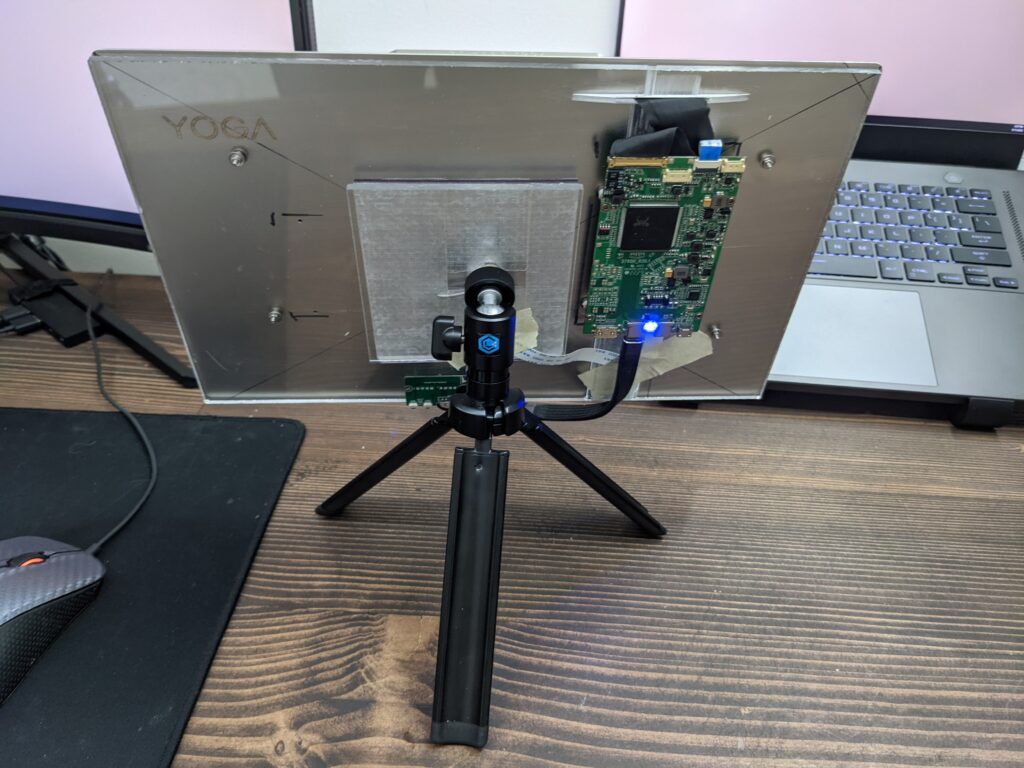
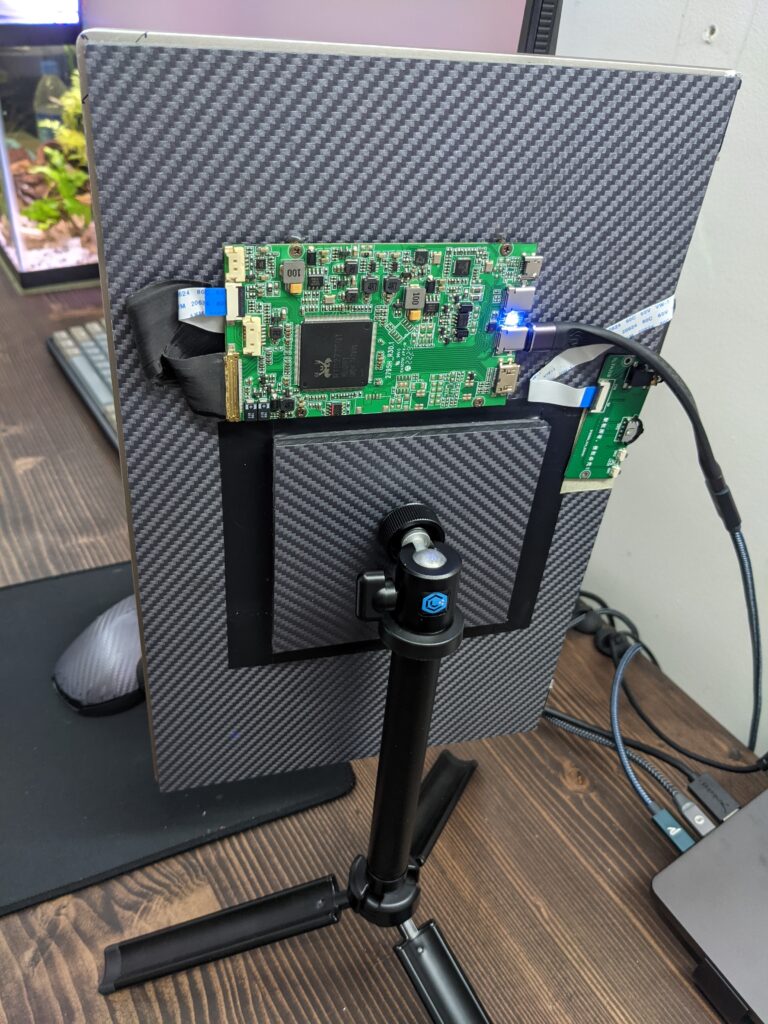
This is how it looks prior to applying vinyl wrap. I installed a 1/4 x 20 threaded insert so I could attach it to this small tripod
I applied vinyl wrap to the acryclic panel to give it a more finished look

Finally, I had some carbon fiber textured vinyl wrap left over from another project which I used to hide some imperfections and help it look a little more “finished.”

This monitor has worked well for months now. The 4k resolution on a 14 inch panel lends itself nicely to 200% scaling at full resolution. Text appears very sharp on the monitor and it is very handy for having a reference page or video open while using the main monitor for productivity.

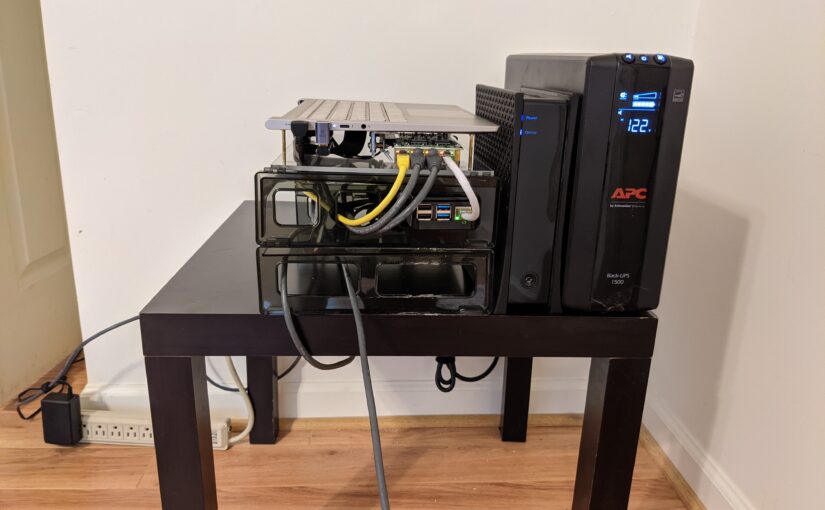
Laptop Converted into Multi-wan Router

This is my current router solution for my home network. I wasn’t satisfied with the performance of my cheap Cudy router with OpenWRT and I couldn’t find a commercially available product with the features I wanted for a reasonable price, so I decided to build my own.

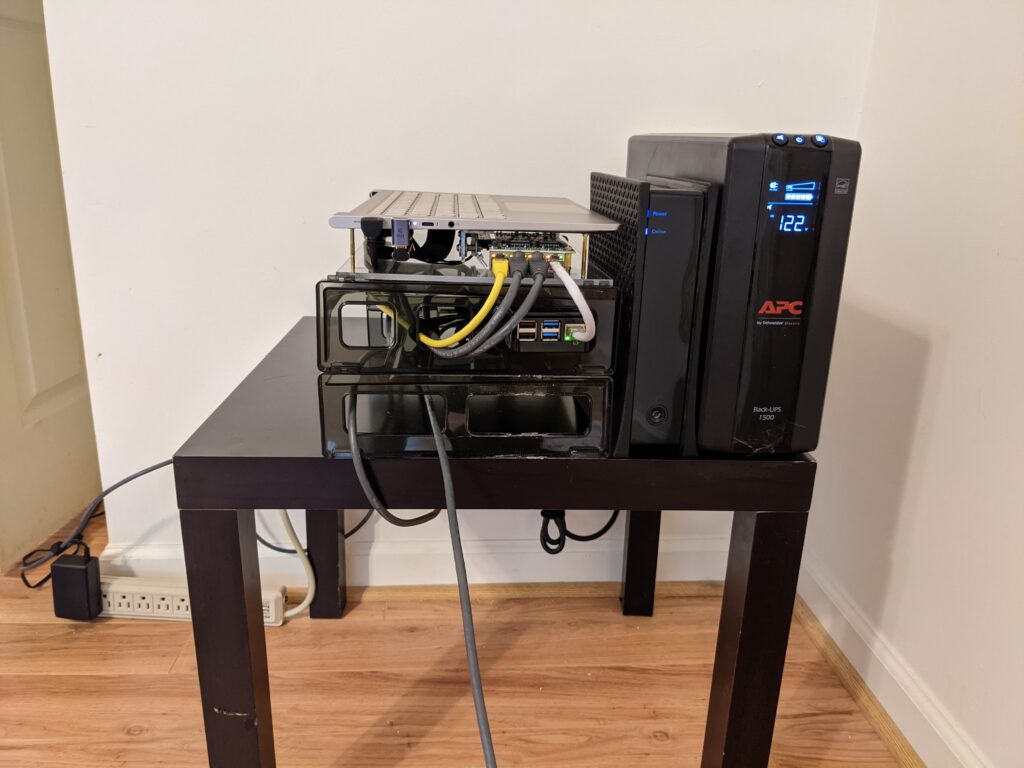
I found a used Lenovo C940 laptop for a heavily discounted price due to the cracked screen and modified it to accept a PCIE NIC. I separated the screen which I later converted into a standalone monitor, and used the base of the laptop as a headless computer for the router.

This laptop was a good candidate for this build for several reasons:

  1. It was afforable
  2. The Intel Ice Lake CPU is powerful and efficient
  3. The NVME slot can accept an adapter which allowed me to connect a PCIE NIC
  4. The two Thunderbolt 3 ports provide easy IO expansion
  5. USB-C charging makes it easy to source a power supply
  6. The Intel chipset and the rest of the hardware has good linux support

Using a laptop as a router is unconventional and required heavy modifications, but the result is a router with ample resources and an integrated back-up battery. Also, the built-in keyboard and display output makes it easy to troubleshoot if I am ever unable to access the router over the network.

To get an idea of what was involved in modifying the laptop, here are some pictures of the major steps I took:

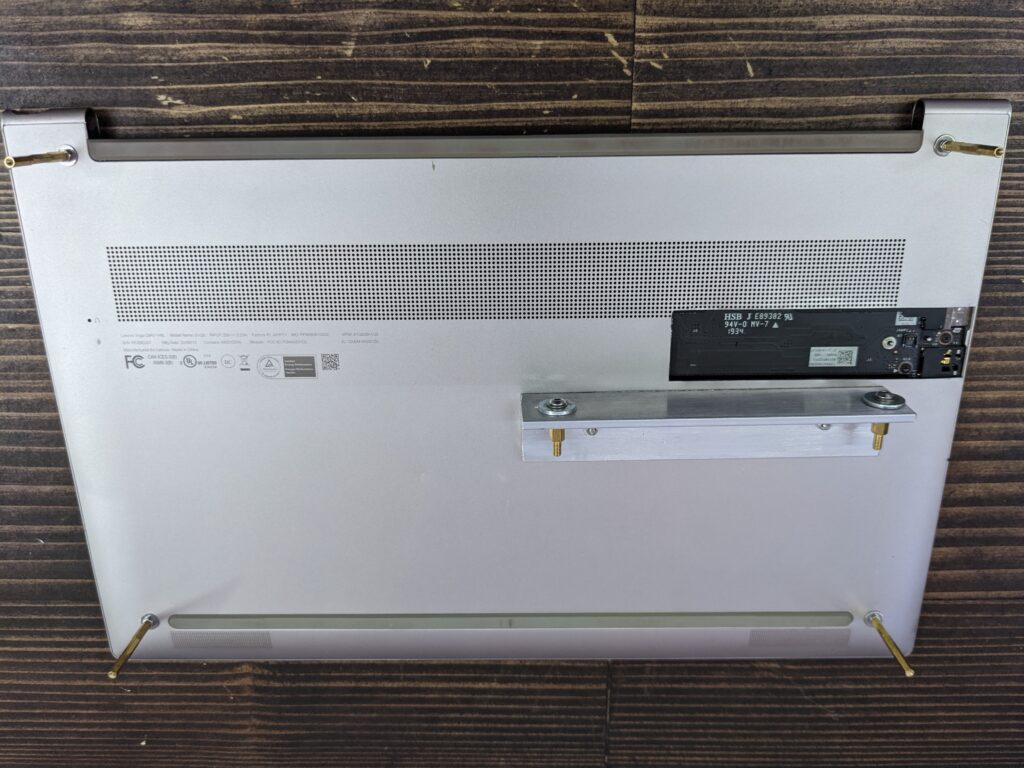
Slot cut out of bottom plate to accept PCIE to NVME adapter, screws replaced with standoffs for mounting of acrylic base plate, angled bracket bolted on to bottom plate for installation of PCIE NIC.
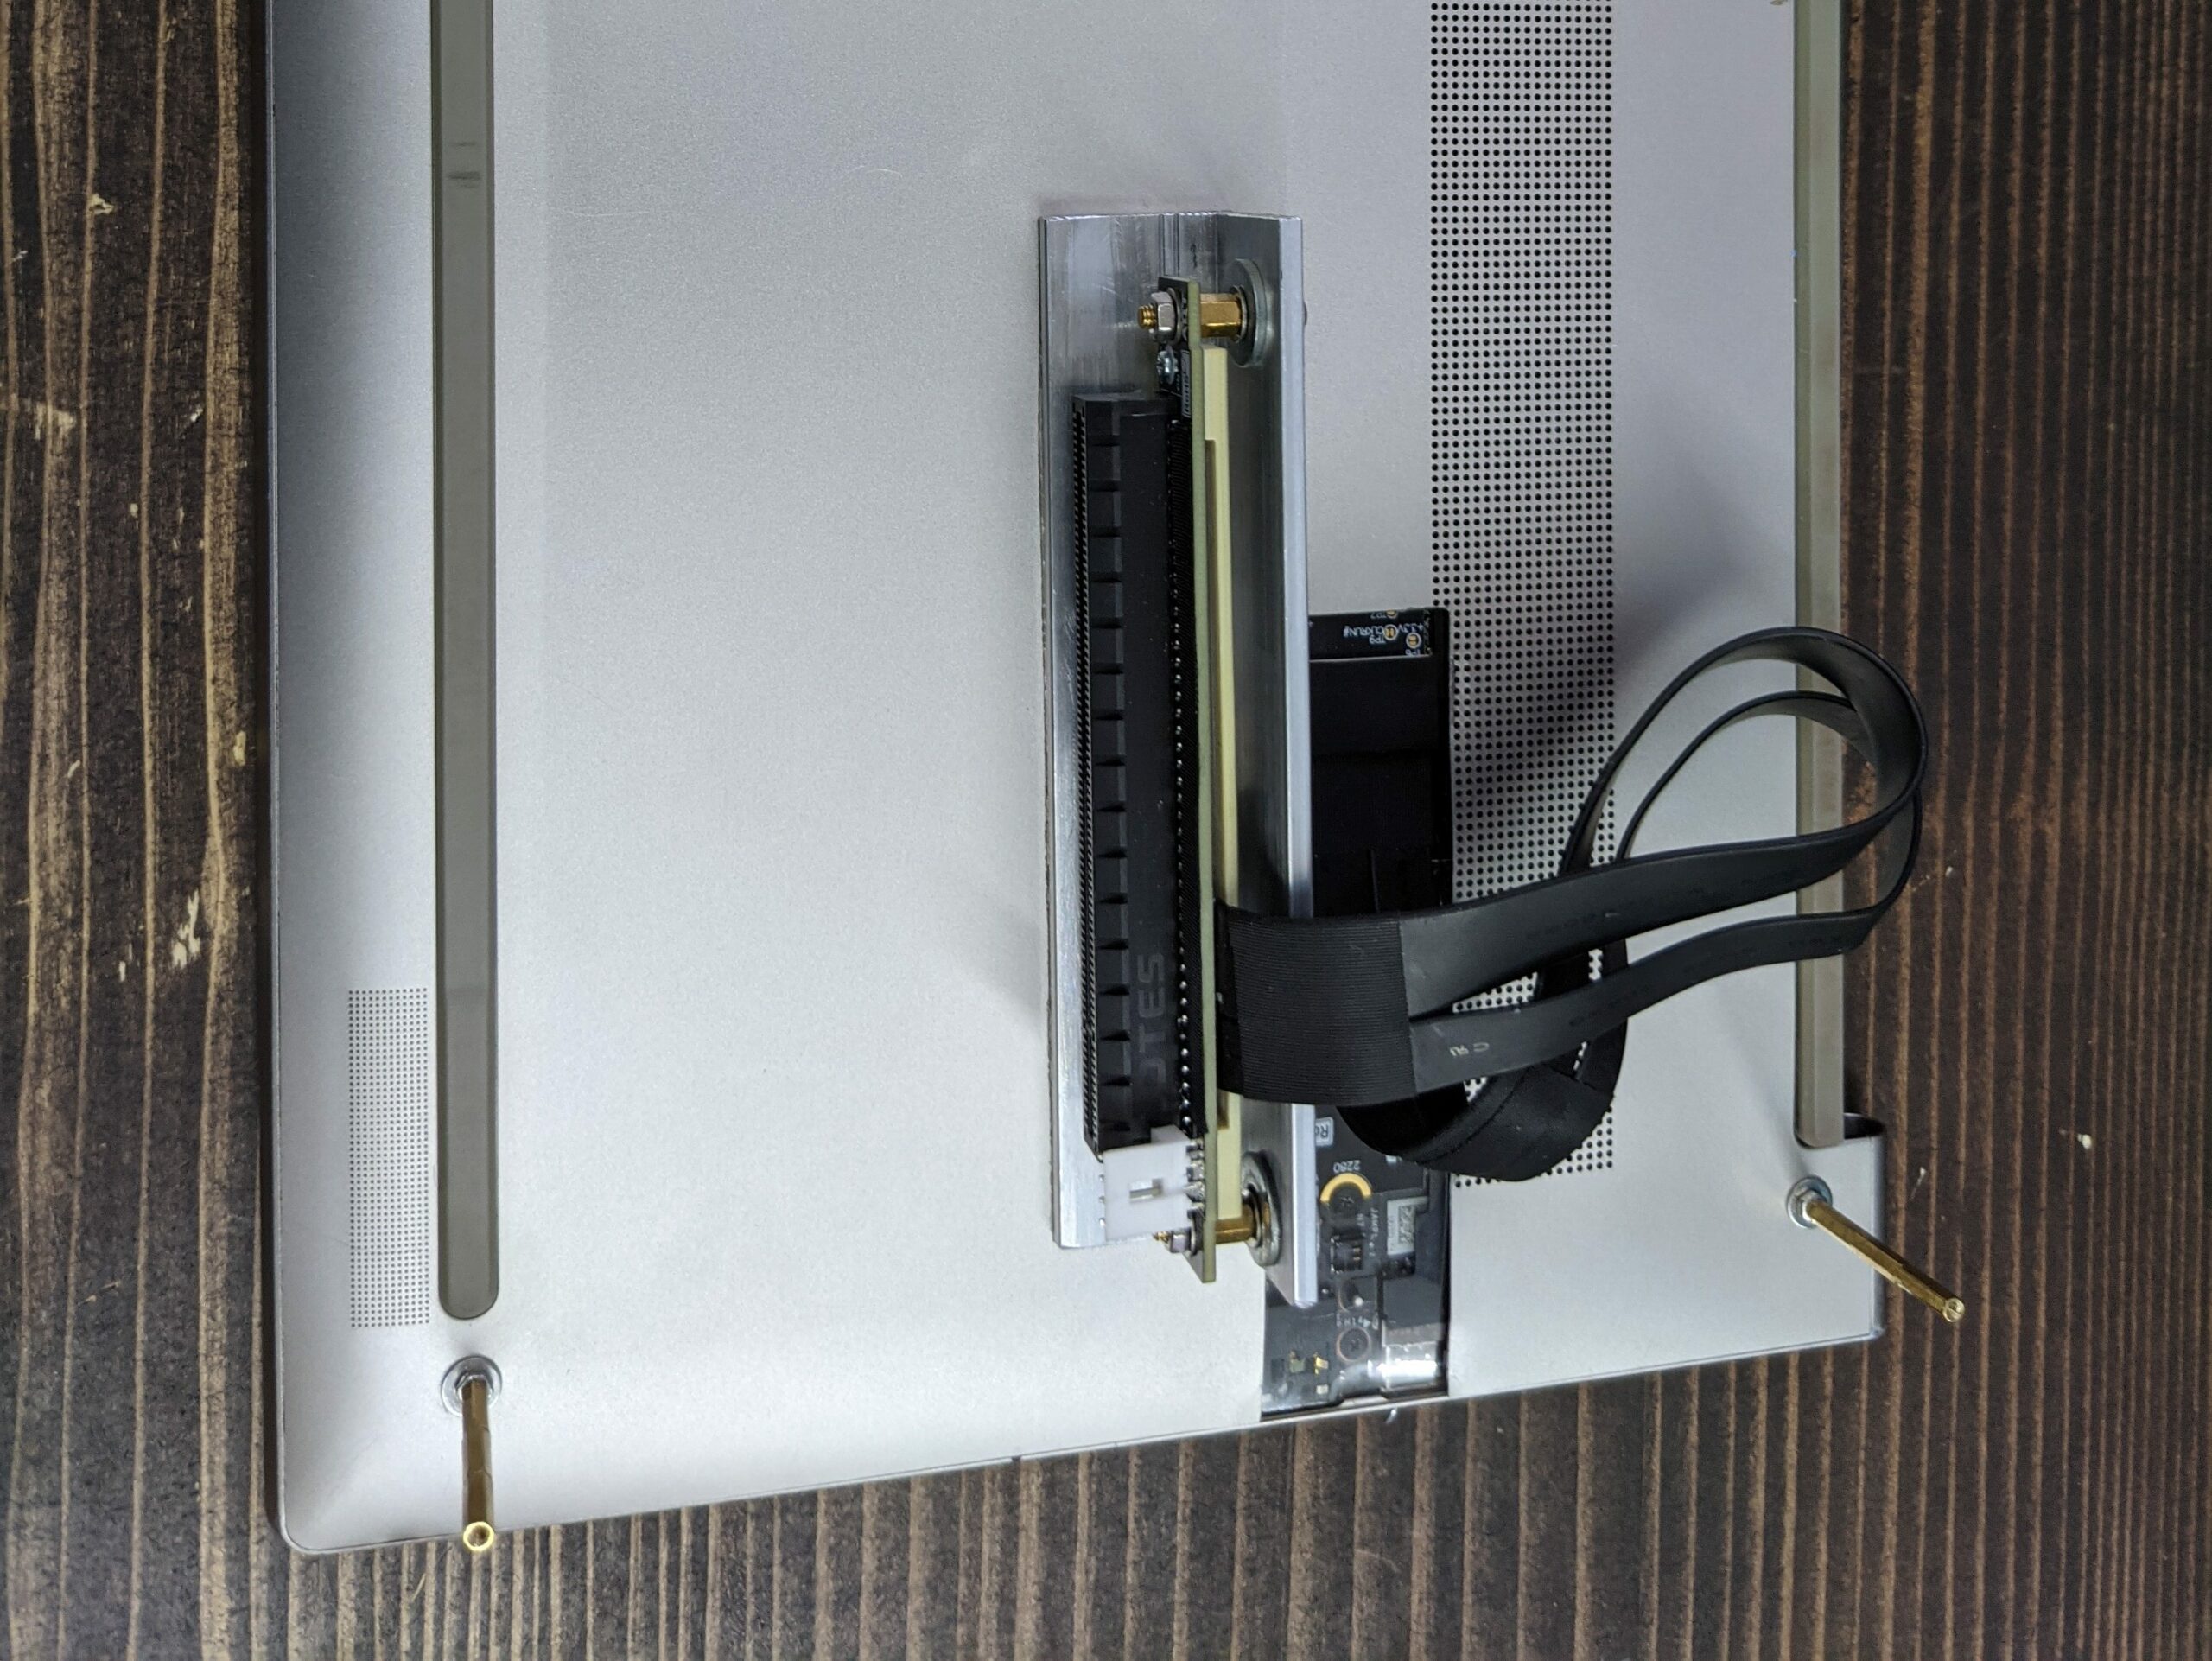
PCIE to NVME riser installed into NVME slot and bolted onto the angled adapter with standoffs
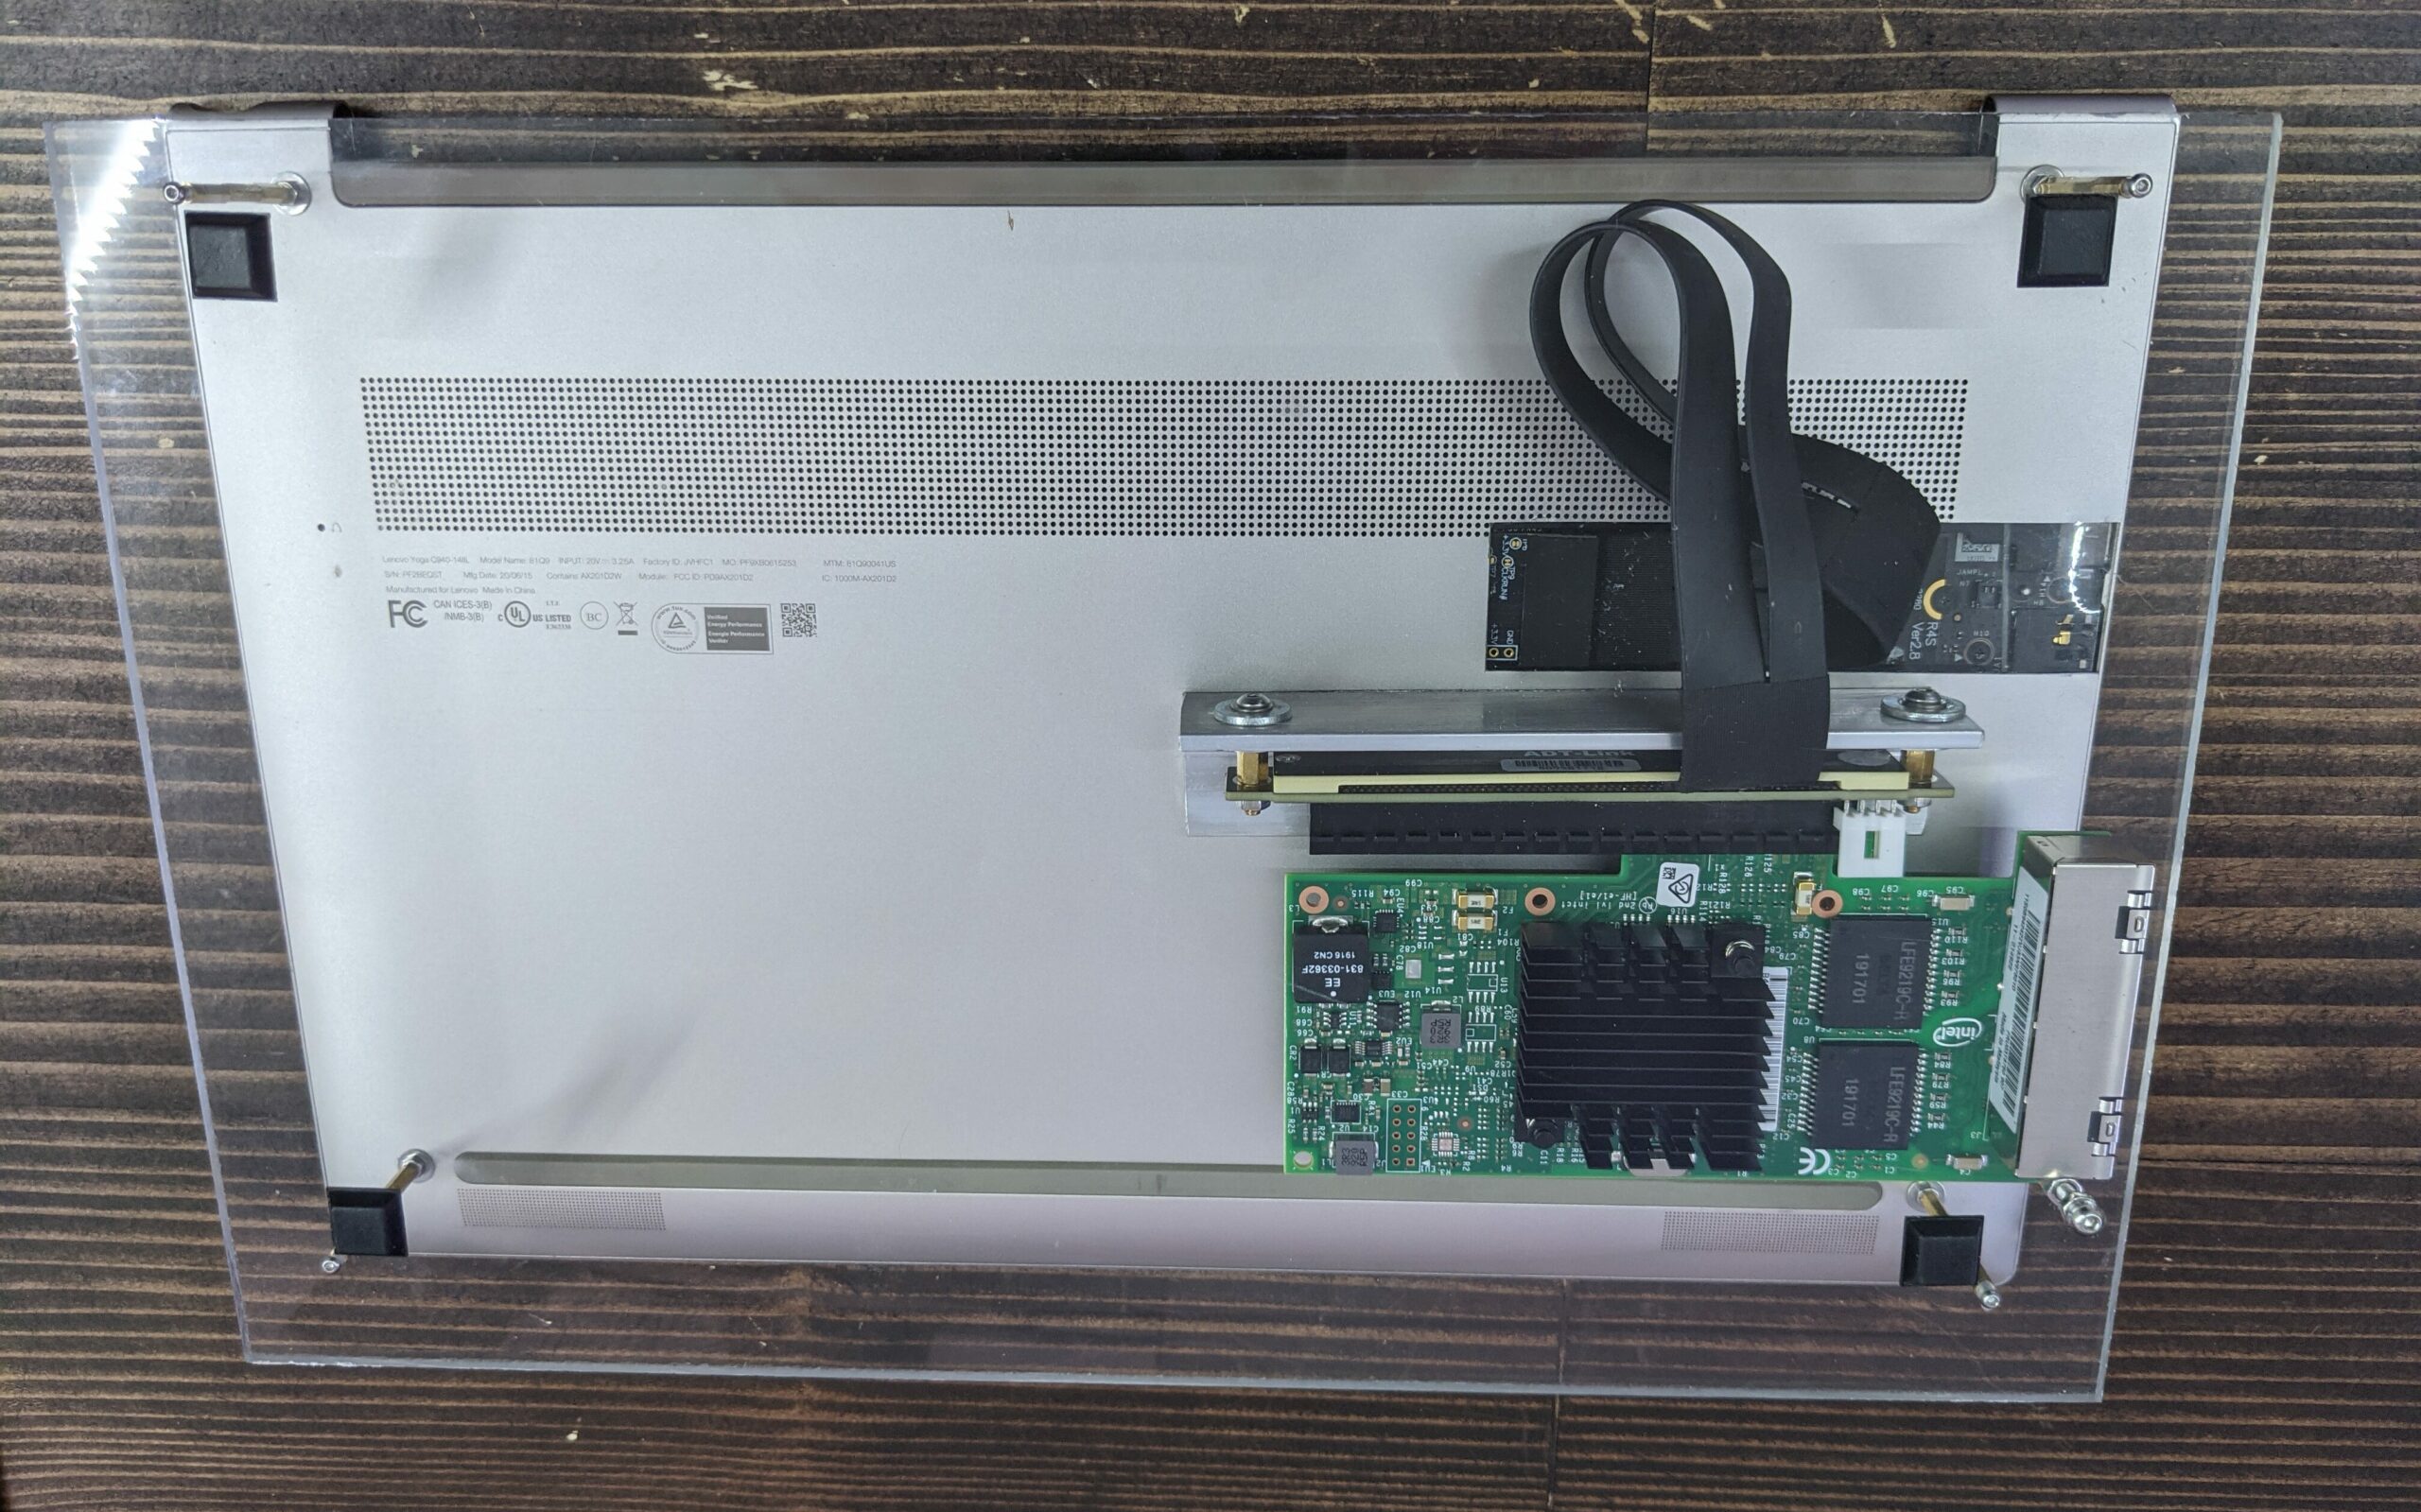
Four port Intel NIC installed into PCIE riser

For the operating system, OpenWRT is installed on a USB 3.0 flash drive connected to an angled USB adapter cable so it can be stored neatly between the laptop and the acrylic base. This reduces the possibility of someone accidentally removing the drive and rendering the router inoperable. Though I was concerned about using a flash drive as a main drive for the operating system at first, I learned that OpenWRT loads itself into the RAM on boot. Therefore, the amount of read/write cycles is minimal so even in the worst case scenario of the flash drive failing at it’s minimum rated amount of read/write cycles, I should still have years of use before drive failiure is a concern.

For multi-wan and failover functionality, I installed and configured an OpenWRT package called MWAN3. This allowed to assign to of the ethernet ports on the NIC as WAN ports. The WAN connections are provided from two ISPs. One is a cable internet connection coming from a cable modem, and the other is a 4G/5G cellular connection provided through a Netgear MR6400 5G hotspot which has an ethernet output. The redundancy provided by these two connections is robust because they rely on two entirely separate infrastructures. The router defaults to routing traffic through the cable modem by default and if that connection goes down, packets are automatically diverted to the hotspot. This failover functionality is fast, seamless and automatic. While connected to the network, users don’t notice any interuption in service when the main connection goes down.

The result is a router with more than enough resources for my home network. It can easily handle custom firewall rules and multiple WAN connections. The CPU isn’t even remotely a bottleneck when it comes to VPN connections, either through OpenVPN or Wireguard. The excess resources give me the freedom to install OpenWRT packages for QOS, IDS and IPS, and custom DNS configurations without ever having to worry about high CPU utilization, at least for the foreseeable future.